Documentation Index
Fetch the complete documentation index at: https://docs.cnap.tech/llms.txt
Use this file to discover all available pages before exploring further.
What Workspaces Contain
Workspaces group related resources to keep your infrastructure organized:Infrastructure & Deployment
Infrastructure & Deployment
- Clusters - Your Kubernetes infrastructure for deploying applications
- Regions - Organizational labels for grouping clusters
- Application deployments - Running instances of your products and applications
Products & Configuration
Products & Configuration
- Products - Sellable software packages you create
- Templates - Reusable deployment configurations that power products and direct deployments
Integrations & Access
Integrations & Access
- GitHub App installations - GitHub App installed on user accounts or organizations, enabling automated deployments from connected repositories
- Workspace members - Users with access to the workspace
- Stripe account - One billing account per workspace for product payments
When to Use Separate Workspaces
Use separate workspaces when you need to manage resources for different organizations or projects independently:- Environment separation - Create separate workspaces for production, staging, and development environments to prevent accidental changes and maintain clear boundaries
- Multiple businesses - Create separate workspaces for different SaaS companies, startup ideas, or business ventures that require complete isolation
- Client separation - Agencies can create dedicated workspaces for each client to keep resources, billing, and access completely separate
- Team organization - In larger organizations, creating separate workspaces per team can make sense depending on your organizational structure, access control needs, and how teams collaborate
- Billing isolation - Each workspace has its own Stripe account, so use separate workspaces when you need distinct billing accounts for different business units or legal entities
When a Single Workspace is Enough
You don’t always need separate workspaces. A single workspace can handle multiple products, customers, and use cases effectively:- Multiple products for different customers - Create separate products within the same workspace for different customers. Each product can have unique configurations, pricing, and settings, even when using the same or different Helm charts.
- Shared infrastructure - Use the same clusters and regions across multiple products to optimize resource usage and reduce operational overhead.
- Unified billing - All products in a workspace share the same Stripe account, simplifying payment processing when you want consolidated billing.
- Team collaboration - Workspace members can access and manage all products and resources in the workspace, making it easier for teams to collaborate on multiple projects.
How Workspace Selection Affects Resource Display
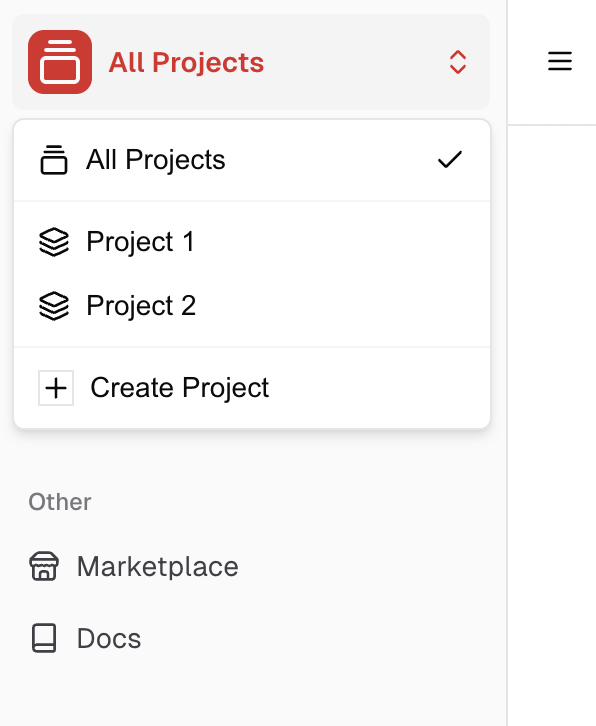
The workspace switcher controls which resources you see in the dashboard:- When a workspace is selected - The dashboard shows only resources (clusters, products, deployments, etc.) that belong to that specific workspace
- When “All Workspaces” is selected - The dashboard shows resources from all workspaces you have access to, giving you a unified view across your entire account
Workspace roles
Each workspace member has a role that controls what they can do:| Role | Permissions |
|---|---|
| Owner | Full control — delete workspace, manage billing, transfer ownership, invite members |
| Admin | Manage apps, deployments, clusters, secrets, and members |
| Member | Deploy apps, view resources and logs |
Organization-based access
A workspace can be managed by an organization. When this is configured, all organization members automatically get admin access to the workspace — no individual invitations needed. This is useful for software vendors managing customer workspaces. The workspace owner retains full control and can revoke organization access at any time.Managing members
Add and manage workspace members through the REST API:Creating workspaces
Create a workspace by clicking “Create Workspace” in the workspace switcher located in the sidebar at the top left of the dashboard. Define a name and optional icon that will be displayed in the switcher. You can switch between workspaces at any time to manage different sets of resources.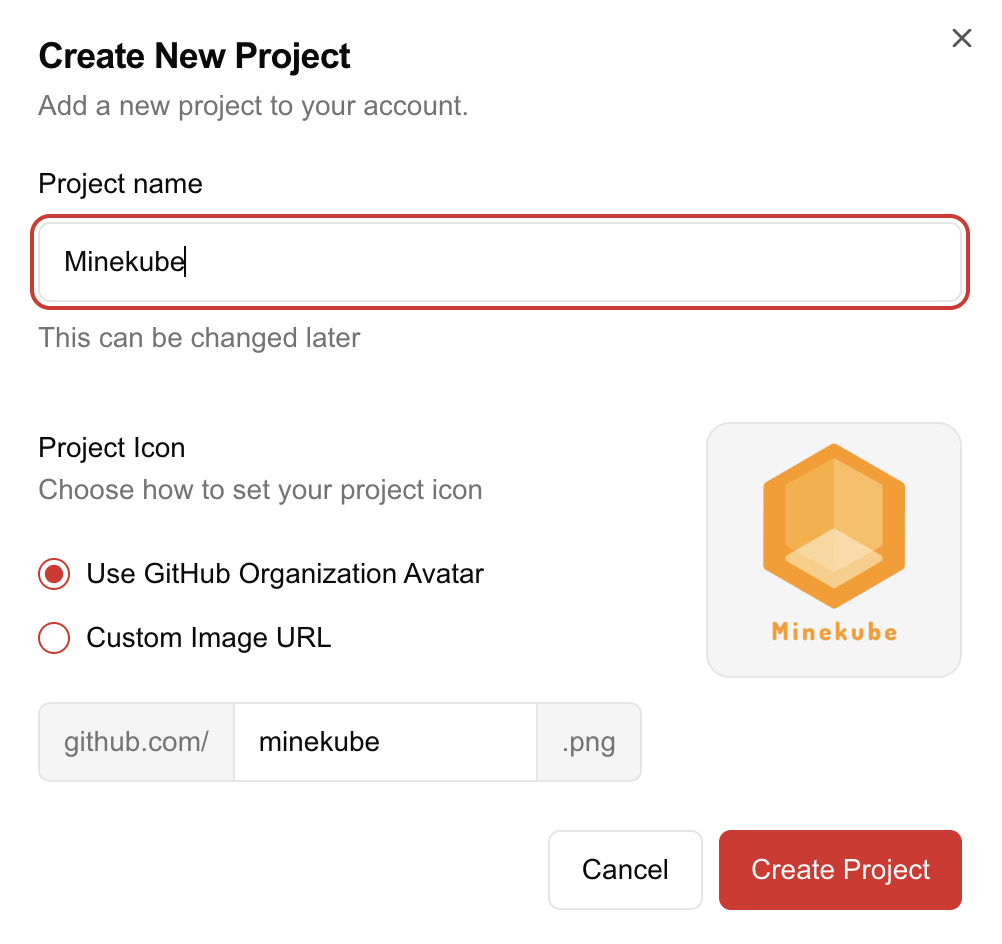
Related topics
- Organizations → - Manage teams and partner access across workspaces
- Create a cluster → - Set up infrastructure in your workspace
- Create a product → - Package your software for sale
- Set up payments → - Connect Stripe for billing
- Marketplace → - Sell products to customers